How to mount a plug-in solar panel on a balcony
A panel on a balcony is a sail with a hard edge, a few floors up. Most of the work is deciding whether the balcony can hold it, and only then fitting it.
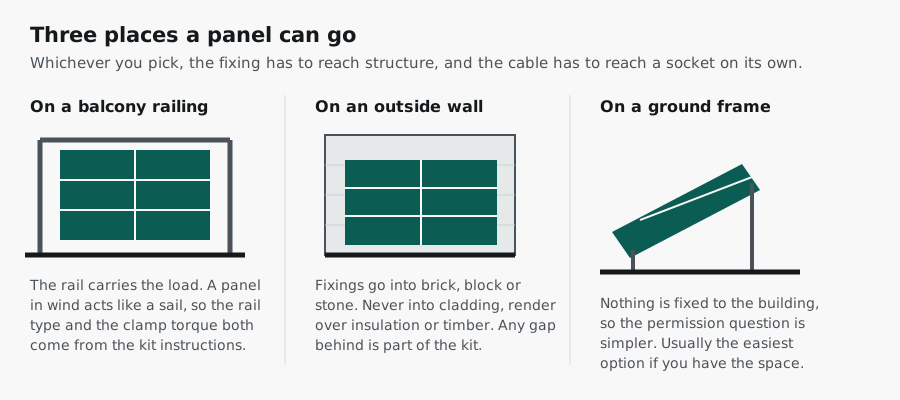
Read this first. The rules permit balcony mounting. The kits do not all allow it. Several of the first kits on sale in the UK are sold for ground mounting only, and at least one states plainly that it is not suitable for balconies.
The kit instructions are binding. Installing it in a way the maker does not allow means the product is no longer compliant, whatever the regulations say in general. Check the listing and the manual before you buy, and treat everything below as what to look for in a kit that does permit it.
Before anything else
If your building has cladding, or has had fire-safety work, do not fix anything to the wall or the balcony until the freeholder or managing agent has said in writing that you may. Read plug-in solar and cladding.
1. Get consent, and tell your insurer
In a block of flats, a panel on the outside of your balcony is an external alteration. You need the freeholder's or managing agent's written consent. If you rent, you need the landlord's.
Tell your buildings or contents insurer as well. An undeclared external alteration can affect a claim, including a claim that has nothing to do with the panel.
2. Work out what the balcony is made of
Look at the rail and at the floor, and identify each part. Steel rail bolted to a concrete slab is the strong case. Glass panels in a clamped frame, timber decking, and infill panels are not things to fix a panel to.
- Fixings go into structure only. Never into cladding, never into render over insulation, never into balcony timber or decking.
- Never into a glass balustrade, its clamps, or a plastic infill panel.
- If you cannot identify what is behind the surface, stop and ask the managing agent.
3. Check the rail can take the load
A rail feeling solid when you lean on it tells you very little. A panel adds its own weight, held out from the rail, plus wind pushing and pulling on it in gusts. That is a bending load on the rail posts and their fixings, applied thousands of times.
If the balcony is anything other than obviously heavy steel or concrete, get it confirmed before you fit. Your managing agent may hold the balcony loading figures. Otherwise this is a job for a structural engineer, and it is a short piece of work.
There is no national wind figure, no national height limit and no national balcony loading limit. This surprises people, so it is worth being plain about it.
The rule is that the manufacturer has to work it out and tell you. The mounting system must be shown by structural analysis to handle wind and snow loads for every mounting configuration the maker allows, calculated to the UK wind and snow standards. The instructions must then state the maximum permissible installation height above ground level, and any restrictions needed so the product and its mounting survive those loads.
So the figure that applies to you is in the box your kit came in. If the instructions do not give a maximum height, that is a reason to ask the seller before you fit anything.
Two related requirements are worth knowing. The fixing must be reversible and non-permanent, and must not compromise the building’s structure, fire performance or weatherproofing. And a mounting held on by cable ties, rope, string, tape, bungee cords or straps alone is not permitted.
Source: Plug-in Solar Device Interim Product Specification v2.0, clauses 5.5.1, 8.3.1 and 8.3.2, DESNZ.
4. Use the mounting system from the box
Use the brackets, clamps, straps and fixings supplied, in the way the instructions show, to the torque given. Nothing from a DIY shop. Nothing left over and nothing substituted. If a part is missing, get the part.
The supplied mounting is the only part of the installation that has been tested with that panel. Change it and you are on your own if it comes off.
5. Tilt it if you can
A panel hung flat against a rail sits near vertical, and produces noticeably less than the same panel on a tilt. If the kit has a tilt bracket and your balcony has the depth for it, use it.
South-facing is best, east or west still works, north-facing is not worth doing. Shade matters more than people expect: a railing post, a downpipe or the balcony above can cut output for hours a day. Watch the spot across a sunny day before you commit.
6. Route the cable properly
- The cable must reach a socket on its own. No extension lead, no multi-way adaptor, no reel.
- It must not be crushed by a door or window closing on it, and not pinched under furniture or a planter.
- It must not cross a fire escape route, a shared walkway or a stairwell, or become something anyone can trip on.
- Leave a drip loop so water runs off the cable rather than down it into the socket.
7. Check it again after the first gale
Go back to every fixing after the first spell of high wind, then twice a year. You are looking for movement, rust streaks, and clamps that have slackened. Anything that has moved comes down until it is refitted.